IntelliSensor
Installation Guide
Installing sensors correctly is very important to ensure they are able to operate without interruption from the day to day activities in a high traffic work environment. The sensors should be installed in such a way as to not have any effect on the continual use and re-stocking of temperature controlled storage equipment.
In This Guide
Support
To ensure you are always covered for support when things go wrong it is imperative to following this guide when installing equipment. Careless installation of equipment will not be covered by warranty or support.
General Notes
Sensors need a hub in range to upload their readings to the cloud. If a hub is not in range the sensor will log the most recent readings up to 12 hours internally until it reaches a hub that has a network connection.
Always assess temperature controlled equipment for sensor destroying hazards before performing any install.
- A freezer with a large amount of frost build up suggests too much outside air is allowed to enter the freezer. This is usually the sign of a leak in the door seals or the freezer is used excessively and cannot self defrost. Installing a sensor in this environment will damage the sensor and it will not be covered under warranty. If possible install the sensor outside the equipment using a probe to measure the temperature inside. If this is not possible due to probe length then insert the sensor into a sealed plastic bag before installing inside the equipment. If the sensor is installed inside the frosted equipment with a plastic bag it will need to be inspected regularly to ensure the sensor remains dry.
- It is not recommended to install a sensor into temperature controlled equipment that is above 60°C. Installing above this temperature will not be covered under warranty as this can damaged the sensor. Never put the sensor in an environment above 80°C as this will cause severe damage to the case. Always use a probe if measuring temperatures above 60°C.
- Never install a sensor if there is evidence of a water leak inside equipment. This will get inside the sensor and damage it and will not be covered under warranty.
- The sensors are not waterproof but they do perform without issue in correctly operating fridges and freezers. Infact they are tested in fridges and freezers without cases to ensure correct operating. A light amount of moisture in the air will not damage or affect the sensor.
Installation - Core Temperature
Monitoring the core temperature inside temperature controlled equipment is possible through the use of a IntelliSensor probe and a bottle of liquid. If monitoring equipment that is below 0°C it is recommended to fill a bottle with oil to avoid freezing and bottle expansion/leaking. When monitoring equipment above 0°C a bottle of water will give the best results as the natural properties of water are best at minimising fluctuations due to open doors and re-stocking.
When installing sensors to measure the core temperature the sensor does not need to be installed inside the temperature controlled equipment if the probe is long enough and it is at less risk of being damaged. This will ensure a stronger wireless signal between the sensor and the hub.
The most important step before commencing installation is talking to staff who regularly use the temperature controlled equipment to find the lowest traffic area to install. This will minimise the risk of damaging the sensor and/or probe during daily use or re-stocking.
Once an appropriate install location has been found, the following should be followed:
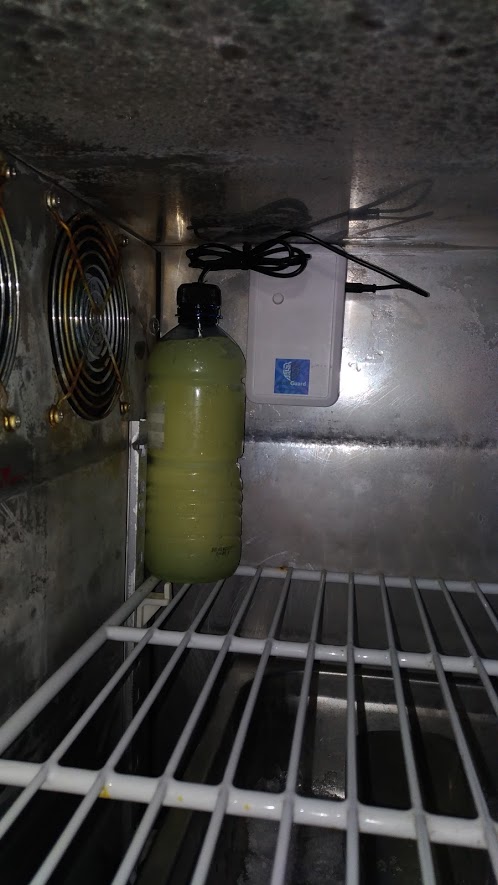
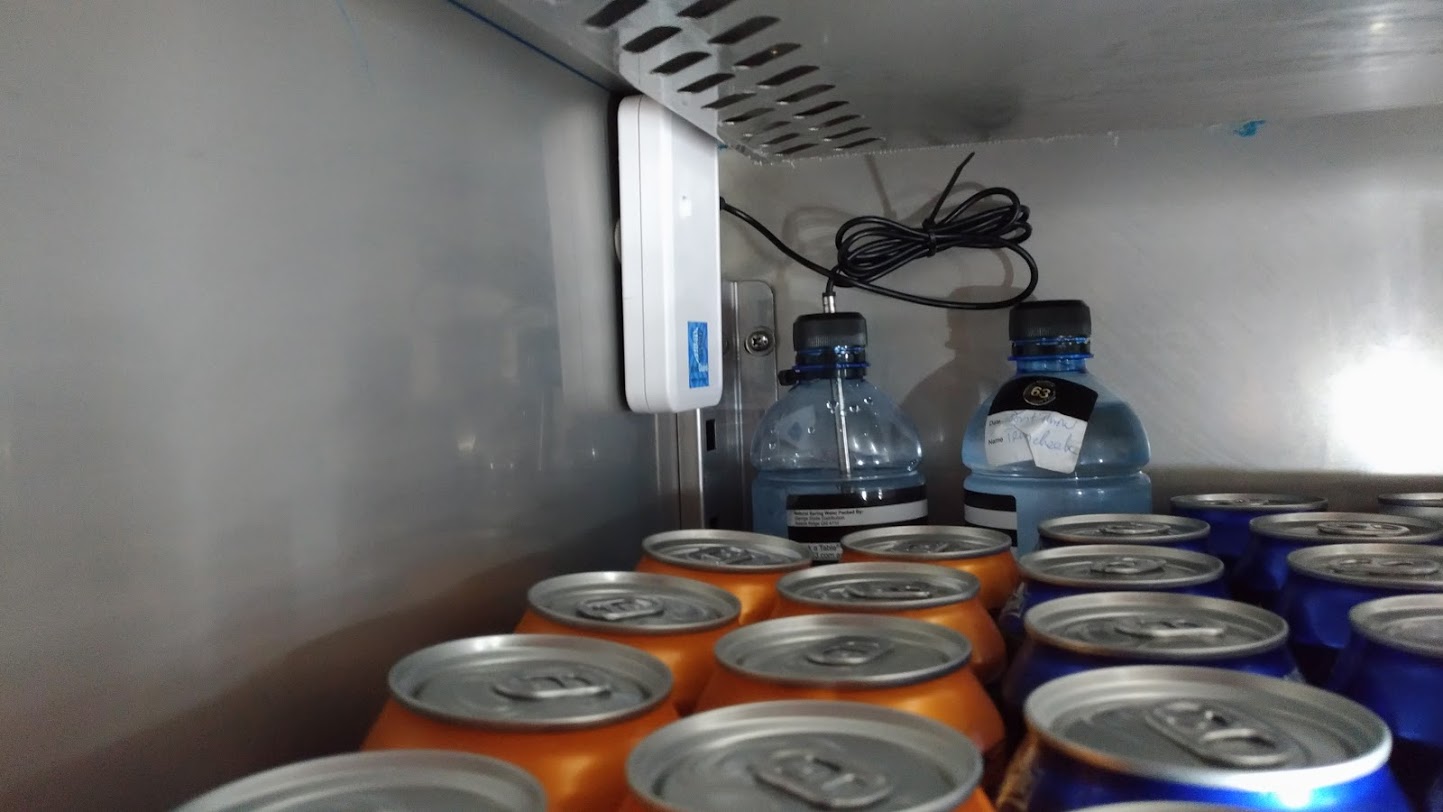
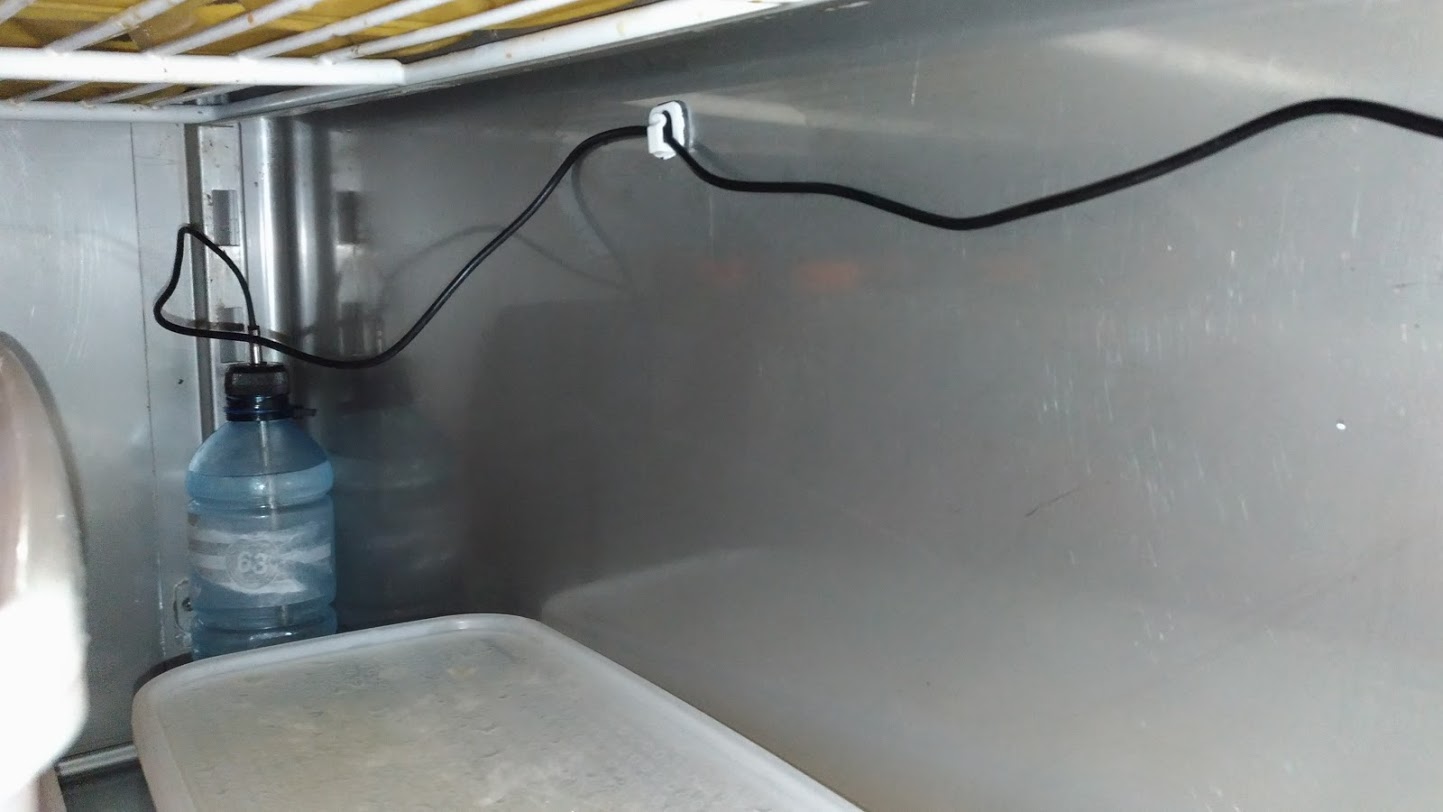
- The temperature probe should be inserted securing into a bottle with at least 60% of the metal part of the probe to be submerged by the liquid of choice. A simple plastic water bottle is adequate for use and a small hole can be pierced in the lid to insert the probe.
- If possible the bottle should be secured by zip ties in the temperature controlled equipment so the bottle cannot fall or move resulting in the probe being pulled from the sensor.
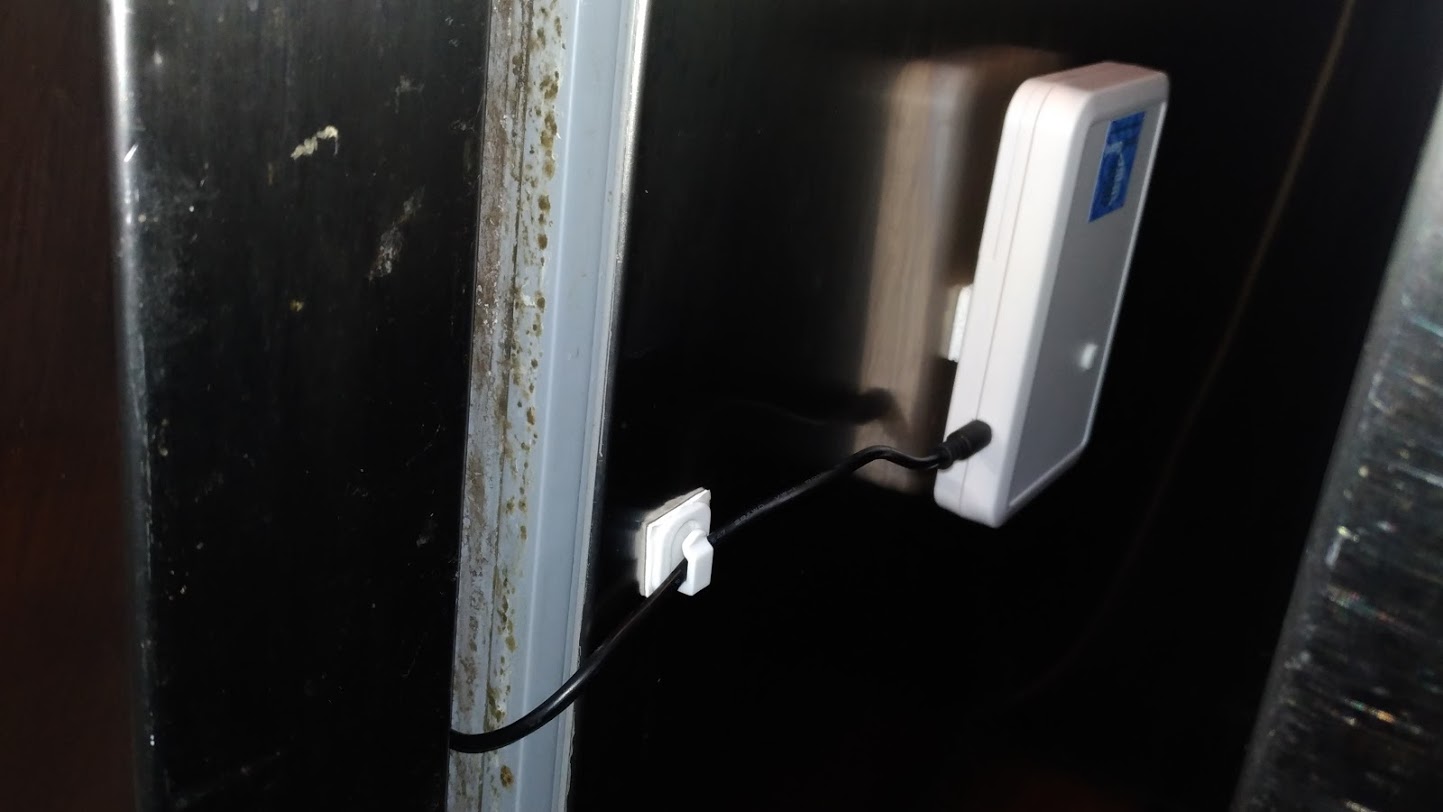
- The sensor should be mounted securely on a wall away from any stock. If the magnets on the back of the sensors are not strong enough to hold the sensor of the wall is not magnetic then velcro wall adhesive strips should be used so that the batteries can easily be replaced when needed. Make sure the wall is clean and dry before using wall adhesive. Use a cloth with hot water to wash away any dirt or ice and dry thoroughly with a paper towel.
- Securely tie up any loose probe wire to ensure staff do no catch it when using the equipment.
- If the probe runs across the wall then use wall adhesive hooks to hold the probe wire out of the way.
Sensor installed inside equipment

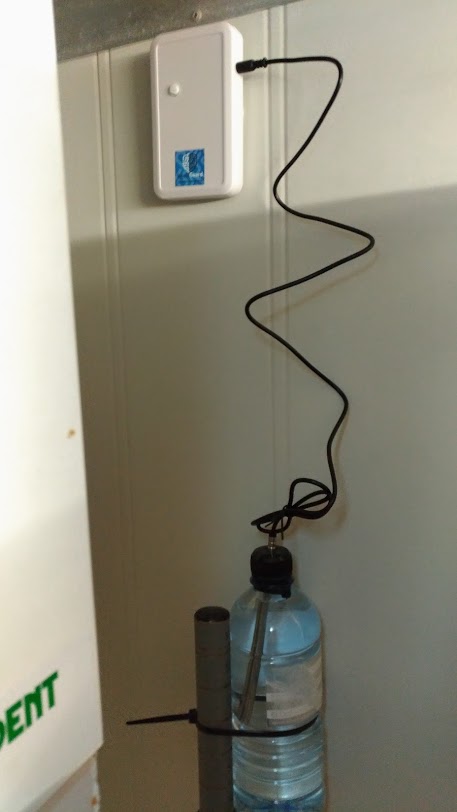
Sensor installed outside equipment
Installation - Ambient Temperature
Monitoring the ambient temperature inside temperature controlled equipment is possible by simply installing an IntelliSensor senor inside the equipment. This is a much simpler install than core temperature as it allows the sensor to be installed completely out of the way of any stock. If the sensor cannot be installed inside the equipment then it can be mounted outside of the equipment and a probe can be used to measurement the temperature inside.
The most important step before commencing installation is talking to staff who regularly use the temperature controlled equipment to find the lowest traffic area to install. This will minimise the risk of damaging the sensor during daily use or re-stocking.
Once an appropriate install location has been found, the following should be followed:
- The sensor should be mounted securely on a wall away from any stock. If the magnets on the back of the sensors are not strong enough to hold the sensor of the wall is not magnetic then velcro wall adhesive strips should be used so that the batteries can easily be replaced when needed. Make sure the wall is clean and dry before using wall adhesive. Use a cloth with hot water to wash away any dirt or ice and dry thoroughly with a paper towel.
- If a probe is used with the sensor securely tie up any loose probe wire to ensure staff do no catch it when using the equipment, or if the probe runs across the wall then use wall adhesive hooks to hold the probe wire out of the way.
No Signal
There may be cases where the sensor is unable to communicate with a hub. To check if this is an issue you can press the button on the sensor once it is installed. If the light on the sensor flashes blue then yellow then it means it cannot reach a hub. If the sensor is installed inside equipment that you cannot get inside and close the door then you will need to wait for its first reading with the doors closed to confirm if it can communicate with the hub.
If the sensor is unable to communicate to the hub then you can try the following:
- If the sensor is installed inside equipment, mount it on the exterior of the equipment and use a probe to measurement the temperature inside.
- Move the location of the hub so that it is closer to the sensor.
- Install another hub closer to the sensor.